From Siding to Flooring: How to Create a Cohesive Home Design

When it comes to home design, achieving a cohesive look requires careful consideration of both exterior and interior elements. Your home’s siding is the first impression it makes, and the hardwood flooring inside sets the tone for the interior. Here’s how you can harmonize your siding with your flooring to create a beautifully unified home.

Choosing the Right Siding

The siding you choose for your home has a significant impact on its overall aesthetic. Here are a few key factors to consider:

  • Color: Select a siding color that not only enhances your home’s curb appeal but also complements the interior design. Neutral colors offer flexibility, while bold hues can make a statement.
  • Texture: The texture of your siding, whether smooth, textured, or patterned, influences the visual impact and can affect your choice of interior flooring.
  • Material: From vinyl and wood to fiber cement and metal, the material of your siding can set the stage for the type of hardwood flooring that will work best inside

Impact on Interior Design

The style and color of your exterior siding can guide your choices for interior design, including hardwood flooring. Here’s how:

  • Neutral Siding Colors: If your siding features neutral tones, you have the freedom to choose from a variety of hardwood flooring options. Consider flooring that either matches or contrasts with the neutral shades to enhance your interior design.
  • Bold or Dark Siding Colors: For homes with bold or dark siding, lighter or natural wood finishes for flooring can create a balanced and inviting atmosphere.

Hardwood Flooring Tips

To make the best choice for your interior flooring, we recommend checking out our comprehensive guide on hardwood flooring tips. Here’s a snapshot of what to consider:

  • Wood Type: Choose a wood type that aligns with your desired interior style. Whether you prefer a modern, sleek look or a classic, rustic feel, there are options to match.
  • Finish: The finish of your hardwood flooring impacts both its appearance and durability. Decide between matte, satin, or glossy finishes based on your needs and style preferences.
  • Color Coordination: Ensure the color of your hardwood flooring complements your siding. Lighter floors can brighten up a dark exterior, while darker floors can add warmth to a neutral siding.

Creating Harmony

For a seamless design, consider the following tips:

  • Coordinate Colors: Use color samples to visualize how the exterior siding and interior flooring will work together. Aim for a balanced palette that flows from outside to inside.
  • Match Styles: If your siding features a modern design, choose flooring that complements this style. Similarly, traditional siding should be paired with flooring that enhances its classic look.

Examples and Inspiration

Here are a few examples to inspire your design choices:

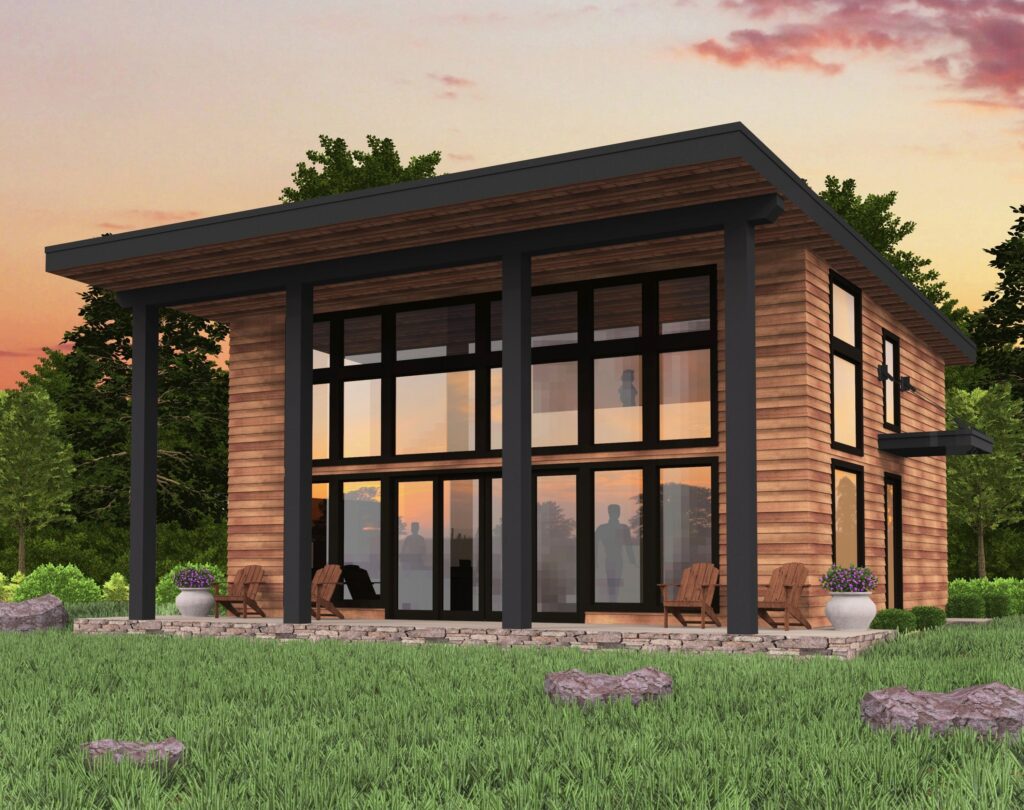
  • Modern Appeal: A sleek, dark siding paired with light oak flooring creates a contemporary look that’s both stylish and inviting.
  • Classic Charm: Traditional wooden siding matched with rich walnut flooring adds a timeless and elegant touch to your home.

Achieving a cohesive look between your siding and hardwood flooring can transform your home into a harmonious and stylish space. For more detailed advice on selecting the perfect hardwood flooring to complement your siding, visit our trusted partners hardwoodfloortips.com. Explore your options and start creating a beautifully unified home today!

Vinyl vs. Wood: Which Window Siding is Right for You?

When it comes to choosing window siding for your home, vinyl and wood are two popular options, each offering its own unique set of benefits and drawbacks. Understanding these can help you make an informed decision that best suits your needs and preferences.

Vinyl Siding

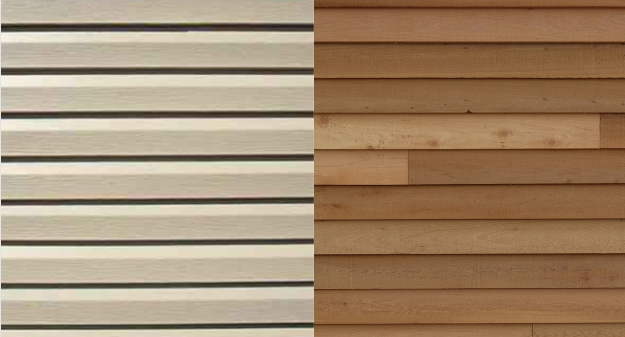
Vinyl siding is a go-to choice for many homeowners due to its affordability and low maintenance requirements. It’s a cost-effective option that doesn’t compromise on durability. Vinyl siding is resistant to moisture, pests, and rot, making it an ideal choice for homes in various climates. It’s also remarkably easy to clean—usually, all it takes is some soap and water.

One of the standout features of vinyl siding is its versatility. Available in a wide range of colors and styles, vinyl can even mimic the look of wood, stone, and other materials. This allows homeowners to achieve a high-end look without the high-end cost. Additionally, vinyl siding often includes insulation options, which can enhance your home’s energy efficiency.

However, vinyl siding isn’t without its downsides. While it can imitate the appearance of wood, it often lacks the authentic feel and charm of real wood. Repairing vinyl can also be tricky, as damaged panels usually need to be replaced entirely. Moreover, vinyl is made from PVC, a material that poses environmental concerns due to its non-biodegradable nature and the impact of its production and disposal.

Wood Siding

For those who value a classic and natural aesthetic, wood siding is hard to beat. It offers a timeless look that adds warmth and character to any home. Wood siding is also highly customizable—you can paint or stain it in any color to suit your style. Furthermore, wood is a natural insulator, providing better thermal insulation than vinyl, which can help keep your home warm in the winter and cool in the summer.

Wood siding can also boost your home’s value. Its aesthetic appeal and quality can be a significant selling point. However, this comes with a higher price tag, both in terms of initial costs and ongoing maintenance. Wood siding requires regular upkeep, including painting, staining, and sealing, to protect it from the elements. It’s also susceptible to damage from pests, rot, and moisture, and can warp, crack, or split over time.

Despite being a renewable resource, the environmental impact of wood siding should not be overlooked. The process of harvesting wood can be damaging to forests, and the paints and stains used for maintenance can have harmful environmental effects.

Deciding between vinyl and wood siding ultimately comes down to your personal priorities and preferences. If you’re looking for a cost-effective, low-maintenance, and durable option, vinyl siding might be the way to go. On the other hand, if you’re willing to invest in a material that offers unmatched aesthetic appeal and customization options, wood siding could be more suitable.

Consider your budget, your willingness to perform regular maintenance, and your aesthetic goals when making your decision. Both vinyl and wood siding have their merits, and choosing the right one will depend on what you value most in your home’s exterior.

Enhancing Your Home’s Curb Appeal with Door Siding

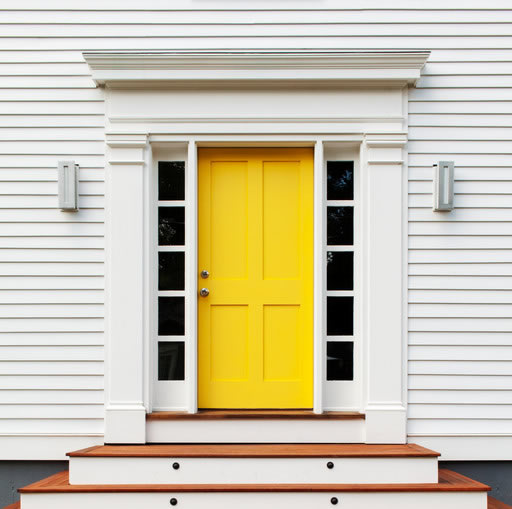
Door siding, or the materials and trim surrounding exterior doors, is crucial for enhancing a home’s aesthetic appeal and protecting it from environmental elements. This siding can be crafted from various materials, each offering unique benefits; wood provides a classic, customizable appearance but requires regular maintenance, while vinyl offers a durable, low-maintenance alternative that can effectively mimic more natural textures. Fiber cement is celebrated for its robustness, being resistant to fire, termites, and rot, making it ideal for harsh weather conditions, whereas aluminum, another sturdy option, supports modern designs with its fire resistance and minimal upkeep. When selecting siding, homeowners should consider factors like climate, the home’s exterior design, and their maintenance willingness. Proper installation is crucial—accurate measurements and appropriate tools like levels and saws ensure the siding fits perfectly and functions as intended. Regular maintenance, including cleaning and inspecting for damage like moisture ingress or warping, extends the lifespan and preserves the appearance of door siding, ensuring it continues to enhance the home’s curb appeal and structural integrity effectively.

Door siding, or the trim and material that surrounds your exterior doors, plays a vital role in both the aesthetic appeal and functionality of your home. Not only does it contribute to the first impression of your house, but it also provides essential protection from the elements. In this guide, we’ll explore the different types of door siding, how to choose the right materials, and tips for installation and maintenance.

1. Understanding Door Siding
Door siding includes all the materials around the door frame, from the trim that outlines the door to the panels or siding that fits beneath and beside the door. It can be made from various materials, each offering distinct benefits and styles. This trim is crucial for sealing out the weather and can also significantly enhance the visual appeal of your entrance.

2. Types of Door Siding Materials
Wood: Traditional and versatile, wood siding offers a classic look that can be painted or stained to match any home’s exterior. It requires more maintenance but provides a natural and customizable option.
Vinyl: A low-maintenance, durable, and affordable choice, vinyl siding resists moisture and decay and can mimic the look of natural materials.
Fiber Cement: Known for its durability and resistance to fire, termites, and rot, fiber cement siding is a robust option that can also be painted to suit your home’s style.
Aluminum: Metal sidings like aluminum are durable, fire-resistant, and nearly maintenance-free. They can also be painted and are excellent for modern home designs.

3. Choosing the Right Siding for Your Door
Choosing the right siding involves considering durability, maintenance, cost, and aesthetic compatibility with your home. Factors like climate and exposure to the elements should guide your material choice. For instance, vinyl and fiber cement are excellent in areas with high humidity or frequent storms, while wood might be more suitable for a controlled climate.

4. Installation Tips
Measuring and Planning: Measure the door area meticulously to ensure that you purchase the right amount of material. Consider any irregularities around your door frame and plan the layout to minimize waste.
Tools and Equipment: You’ll need tools such as a tape measure, saw, level, and possibly a nail gun. Ensure you have all necessary tools on hand before beginning the installation.
Installation Process: Start by removing any old siding and ensuring the area is clean and free of der new siding, ensuring each piece is level and securely attached.

5. Maintenance and Care
To ensure longevity, regular maintenance is essential. Wood may need periodic staining or painting, while vinyl and aluminum can be kept in good condition with regular cleaning using mild soap and water. Inspect your siding annually for signs of damage or wear and address any issues promptly to prevent further deterioration.

6. Common Problems and Solutions
Moisture Damage: Ensure your siding has proper caulking and sealants to prevent water ingress.
Warping or Buckling: This can occur if the siding is not properly installed. Make sure there is a little room for expansion and contraction due to temperature changes.

Door siding is more than just a decorative frame for your door; it’s a critical component of your home’s weatherproofing and insulation system. By choosing the right materials and ensuring proper installation and maintenance, you can enhance both the beauty and efficiency of your home. Whether you’re updating old, worn siding or installing new siding on a recent addition, these tips will help you achieve great results that last.

Out with the Old and In with the New: How to Replace Broken Vinyl Siding

Accidents happen – and they can happen to your vinyl siding. It only takes one newly-licensed driver getting too close to the house, a solid home-run hit that didn’t quite make it into the field, or a hit from a wild windstorm to ruin your vinyl siding. Unless you were hit by a tornado, hurricane or earthquake, you don’t need to re-side your entire house. Just replace the piece or pieces of vinyl siding that are damaged.

If you know how to use a hammer and nail, you can learn how to replace a broken piece of vinyl siding using simple tools. Your biggest challenge will be to not break or damage other pieces of siding in the process. It’s not as easy as gluing on a piece of vinyl siding to cover a crack, but by using a prybar and an inexpensive tool called a “zip tool” it’s easy enough for a beginner.

A zip tool is made specifically for removing and installing vinyl siding. Any hardware or lumber store that sells vinyl siding will likely sell zip tools. It’s an easy-to-use lightweight hand tool made up of a handle and a flat square hook. You’re going to use the zip tool to unlock the good vinyl siding piece from the bad vinyl siding piece.

First, look at the overlapping vinyl pieces and find the edge where a good piece of siding overlaps the top of the broken piece of siding. Put the zip tool, hook side up, between the edges. Use the tool to carefully lift the bottom of the top piece of siding to uncover the top of the broken piece. Don’t pry too hard or you might break the vinyl. Slide the tool along the interlocking edges and unlock the two pieces.

Once the edges are loosened from each other, carefully lift up the top piece to expose the J-channel. A “J-channel” is a long thin piece of vinyl (or metal) with holes in it. Your broken piece of vinyl will be nailed into the wall through the J-channel. Don’t bend the top piece of vinyl too far or it will break and you’ll have more work to do. You can now see where your broken piece of vinyl siding is nailed in through the J-channel on the wall.

Your next objective is to take the nails out of the J-channel and the wall so you can remove the broken piece of vinyl. You will not be able to fit a hammer between the two pieces of vinyl to get the nails out, so use the flat end of a pry bar. If the prybar is going to hit nearby pieces of healthy siding, put a piece of wood underneath the prybar to protect the siding.

Once the nails are out, remove the damaged piece of vinyl siding. You might have to jiggle it or pull it up or down to loosen it. You can then nail on the new piece of siding. Do not use the same holes as the old one, and make sure you drive the nails in straight and not at an angle. You will likely have to use the pry bar to hammer in the nails as well. You do this by hammering on the neck of the prybar holding the nail.

Once the replacement piece is nailed in, use the zip tool to refasten the two pieces of vinyl siding. Put the zip tool inside the edging again and pull the old strip out and over the edge of the new strip. Once you pull the edging out and over, press your hand against the zip tool to lock the vinyl edges into place. Keep sliding the tool along the edging repeating the process until it’s all locked into place.

Your siding should be as good as new. Your teenage driver will eventually stop hitting the house, and the home-run hitter will eventually grow up and make the major leagues – but you can’t stop mother nature from damaging your vinyl siding. Keep some extra pieces of siding around, and keep your prybar and zip tool handy. You never know what’s going to fly your way, but you can be sure that you’ll be able to repair the aftermath of the collision.

The Building Blocks of Beginning Porch Planning – II

Your porch roof should be chosen primarily for protection, and then for aesthetic appeal. You may need a strong roof to support winter’s continuously falling snow, or perhaps a light canopy is all you need to keep the sun from burning your skin. Your ceiling choice must of course be compatible with the roof, and it should also become an attractive extension of the walls and home.

Although weather is a primary consideration when planning a porch wall or enclosure, the aesthetic appeal of your walls will have a far greater impact on daily living than the aesthetics of the roof over your head. Keep in mind that porch “walls” can be windows, screens, glass blocks, drapes, blinds, or a host of other materials. Porch “walls” can be movable or permanent, decorative or protective. Likewise, the columns you choose should complement your chosen flooring and wall material – and ideally your decor.

The lifestyle your porch supports will determine how you approach each building block of the porch planning process. Review the potential for safety and danger in every building block choice your consider. Your decisions will change over the years, but it’s a lot easier to change your furniture and décor than it is to change your ceramic or stone floor. Make sure you consider the long-term effects of each decision.

Planning the perfect porch is a fun project that must not be done hastily. Great thought must be given to weather, safety, design, practicality, growth and changes, lifestyles, and of course personal preferences. A sturdy porch built to your well-thought out expectations one building block at a time will give your generations a place to always have good food, good friends, and a welcoming place to always enjoy home. Provided by Hardwood Floor Installation Arlington Heights IL

The Building Blocks of Beginning Porch Planning

North, South, East or West – all over the country, porches convey peace, family and friendship. Country folks might use their wide wrap-around porch to enjoy the tranquility of rolling hills, blue mountains, and a pitcher of ice-cold sweet tea. On the ocean front, a sea-side porch hosts a gathering of giggly friends enjoying Chardonnay in the fresh salty air, while a water-colored sunset fades into the ocean’s horizon.

Miles and miles away, inner city porches are compacted together with folks leaning on paint-worn posts discussing the latest news and keeping a watchful eye on their kids running neighbor to neighbor and porch to porch as toys get strewn about. As the night falls far off into the distance, a penthouse porch turns into a midnight dance floor for two, where a full moon hovers over the cascade of glittering city lights below.

Good times don’t always require planning, but planning for a perfect porch will give you assurance that good times can always be had. To plan a perfect porch, start with examining each building block of the porch planning process. The building blocks of porch structure are floors, walls, ceilings, columns, and roofing. The building blocks of a porch interior are floor coverings, wall coverings, furniture, lighting, electrical outlets and plumbing. The final tier of porch planning consists of the final touches – plants, vases, paintings, artifacts – all those special touches that make a porch uniquely yours.

But before your inner interior designer personality surfaces, consider the practical. Picture all possible uses for your porch that could happen over the next 20 years. Brainstorm potential uses with all family members. Older family members might envision of place of solitude and quiet gatherings, others might envision a place for crafts, gardening and games. Young adults might be thinking about entertaining friends, and young children might look forward to an outdoor playroom.

After the life of your porch has been defined, you can start thinking about floors and walls. Wood floors are classic, but a porch floor can be made of stone, ceramic, brick and other assorted floor covering alternatives. Or it can simply be covered with an outdoor carpet. But your porch floor covering must fit your lifestyle, and must be able to tolerate the elements of the outdoors.

Mapping and Glazing Skylights for Solar Heating

If you’re hoping to gain the benefit of solar heating from your skylight, keep in mind that the earth’s orientation and the location of your home will play a big part in installation and heating efficiency. Skylights are a good source of supplemental heat, especially in moderate or warm climates. However, homes in cold northern climates like Des Plaines and Palatine Illinois that struggle to keep warm in the winter won’t receive the same heating benefits, but they can still be installed for maximum solar efficiency according to Peter.

Installing a skylight requires cutting a hole in the roof. In the coldest seasons, a northern winter home with a skylight will experience more energy loss than heat gain from the skylight. This energy loss can be offset with insulation and energy-efficient glazing, but the added passive heat from a traditional skylight won’t reduce your winter bills if you live in ski country. Any window will add energy loss, but since skylights add dramatic benefits to your home, this alone should not be a consideration to avoid installing a skylight. Installing your northern home’s skylight at an angle to provide the most heat will build on its heating efficiency.

If you live in a moderate or warm area in the northern hemisphere, skylights for solar heating can certainly help your winter heating bill but they must be aligned to transfer the heat based on the earth’s seasonal positioning. According to Window Repair To get the most heat out of a winter sun, a skylight should be installed oriented south, or within twenty degrees east or west of true south. It must also be tilted toward the south, traditionally at an angle of the earth’s latitude plus fifteen degrees. Most roofs are steep enough to accommodate these angles, but if you have a flat or customized roof, prepare yourself for some extra installation requirements if you want maximum heat gain from a winter sun.

The glaze on your skylight has significant influence on your home’s intake of solar heating. A clear glaze maximizes light and heat, but a translucent glaze reduces direct heat from the sun. However, a clear glaze also brings in a stronger glare than a translucent glaze. Any tinted glaze will significantly cut down on light and solar heat and is not recommended if you’re looking to partner with the sun to keep your winter thermostat down. Skylights can easily accommodate shades to cut down on summer heat.

Skylights for solar heating have many special requirements that aren’t considerations for decorative installations. However, positioning and glazing your decorative skylight for passive solar heating will maximize your skylight’s heating efficiency.